In this blog, let us see how we can create a module and cmdlets inside it. We will be using Powershell ISE(Administrator) to do this.
First, we will create a cmdlet and then a module.
2) Switch to Script mode(Ctrl+R) and save this script with an extension .ps1
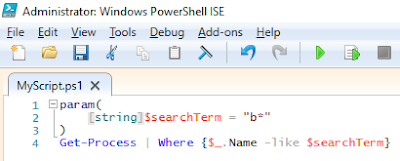
3) Parameterize out the things that might change by using the keyword param.
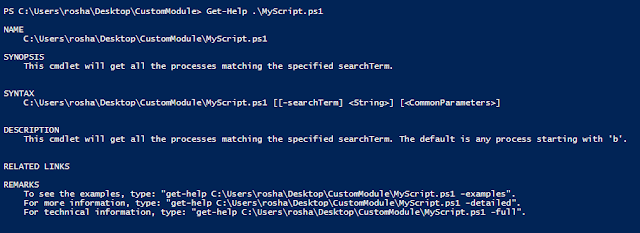
4) Switch to the console mode(Ctrl+R) and check the help content that is being built for this file.

5) It is showing that our parameter searchTerm is a generic Object type. Suppose, we want it to be a string. We can do it like this.
Now, the Get-Help shows the expected type as a string.

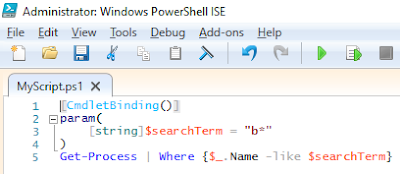
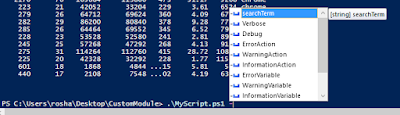
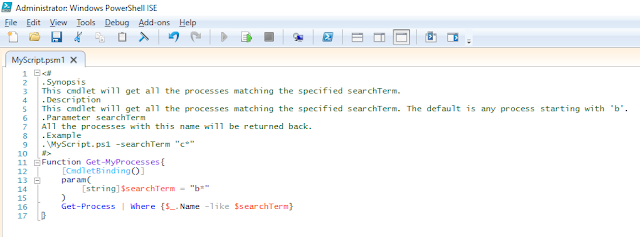
6) We can also decorate our script with CmdletBinding attribute as shown. This gives us extra built-in functionalities like Verbose, Debug etc.

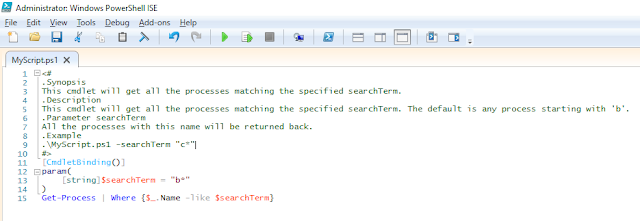
7) To provide properly formatted and additional help for our cmdlet, we can add our inputs in comments on top of the cmdlet. Whatever we mention in the synopsis will be displayed in synopsis section of Get-Help and likewise.
8) Now, except the additional help section, we can enclose the whole thing inside a Function with a name having format Verb-Noun, here Get-MyProcesses.
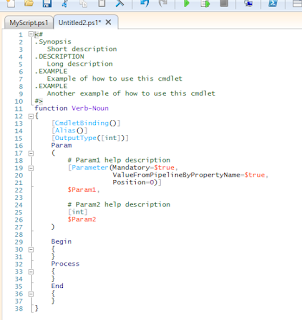
We also have a template for cmdlets. On the script tab, just press Ctrl+J and select the cmdlet option and get the following.
So, now, we have successfully created our cmdlet. How do we use it?
We can use it by importing the .ps1 file and calling the Get-MyProcesses cmdlet.

We would like to make it more standardised so that we can package our cmdlets inside a module and share it with others.
2) We can get all the Module paths in Powershell using the following command. We should deploy our module in the first path i.e. one which is specific to the logged-in user.

3) We need to create this path if it's not already there. Also, we need to have a folder inside Modules folder with name same as the script file name(here, MyScript).

4) Now, copy the package(.psm1) from where you created it to this location.

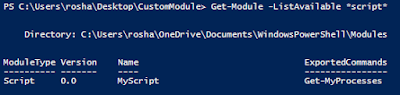
5) That's all. Now, our module and the associated cmdlets are ready for use.
Hope this helps!
First, we will create a cmdlet and then a module.
Create a cmdlet
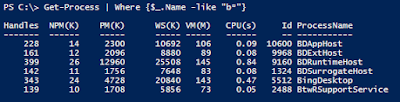
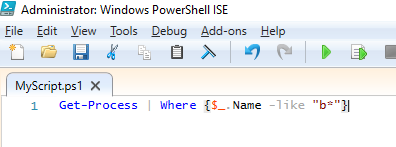
1) Prepare the script which you want to expose as a cmdlet. For demo purpose, I will use the following.
2) Switch to Script mode(Ctrl+R) and save this script with an extension .ps1


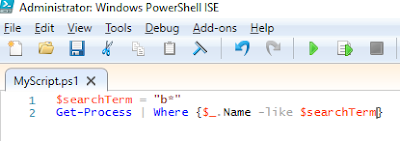
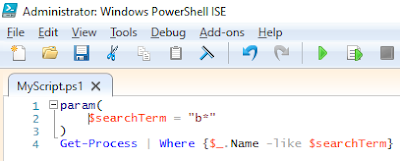
3) Parameterize out the things that might change by using the keyword param.

4) Switch to the console mode(Ctrl+R) and check the help content that is being built for this file.
5) It is showing that our parameter searchTerm is a generic Object type. Suppose, we want it to be a string. We can do it like this.

Now, the Get-Help shows the expected type as a string.
6) We can also decorate our script with CmdletBinding attribute as shown. This gives us extra built-in functionalities like Verbose, Debug etc.


7) To provide properly formatted and additional help for our cmdlet, we can add our inputs in comments on top of the cmdlet. Whatever we mention in the synopsis will be displayed in synopsis section of Get-Help and likewise.


8) Now, except the additional help section, we can enclose the whole thing inside a Function with a name having format Verb-Noun, here Get-MyProcesses.

We also have a template for cmdlets. On the script tab, just press Ctrl+J and select the cmdlet option and get the following.

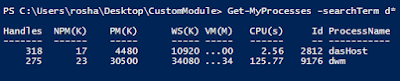
So, now, we have successfully created our cmdlet. How do we use it?
We can use it by importing the .ps1 file and calling the Get-MyProcesses cmdlet.

We would like to make it more standardised so that we can package our cmdlets inside a module and share it with others.
Create a Module
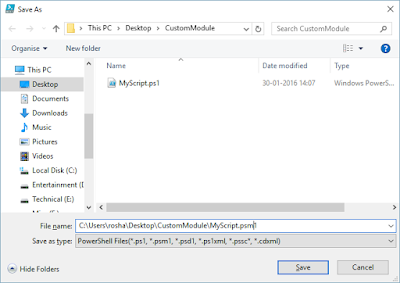
1) Now, just do a Save-As on the script file that you created. Save it with .psm1 extension. This is our module.
2) We can get all the Module paths in Powershell using the following command. We should deploy our module in the first path i.e. one which is specific to the logged-in user.

3) We need to create this path if it's not already there. Also, we need to have a folder inside Modules folder with name same as the script file name(here, MyScript).

4) Now, copy the package(.psm1) from where you created it to this location.
5) That's all. Now, our module and the associated cmdlets are ready for use.


Hope this helps!


